AI Report / LISA Chat
About this chapter
This chapter covers StarNavigator's AI features. It explains the AI Research Report (a forecast report for a period you specify, meant as groundwork for the astrologer), reached from AI Report in the menu, and LISA Chat (an interactive reading with an AI). The AI Report menu is available on the Plus plan and above. LISA Chat is reached from the LISA button at the bottom right of the screen and is available on the Basic plan and above.
Creating an AI research report
Steps
- Open AI Report from the menu.
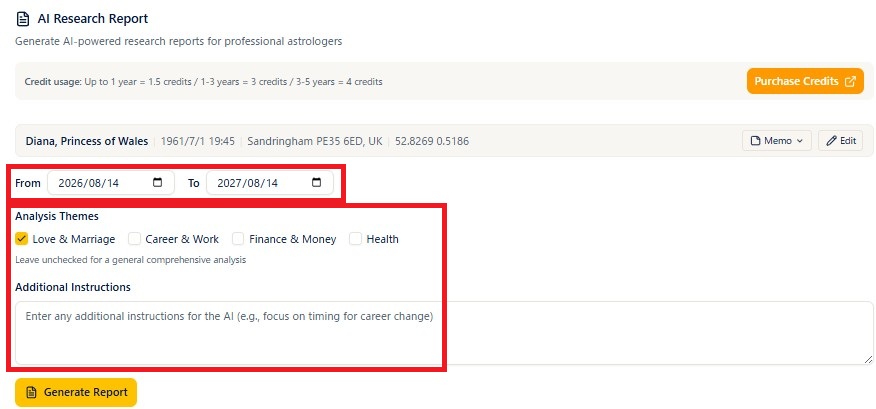
- Choose the subject of the report in the birth data picker in the header (while nothing is selected, Please select birth data is shown).
- The birth data you chose is shown in the form inside the card. To correct it on the spot, just edit the values there (whatever the form holds when you press Generate Report is what gets used).
- Specify the forecast period with From and To (the default is from today to one year ahead).
- Press Generate Report and generation begins; the button changes to Generating report....
- When it finishes, the report appears at the bottom of the screen.
Generation takes a few minutes
Generating a report takes a few minutes. While it is running you may wonder whether it is stuck or broken, but you are welcome to move to another screen and get on with other work in the meantime. Come back to this screen afterwards and the finished report is there (you can also retrieve it from the Saved Reports list).
Notes
- The period can be at most 5 years. Specifying more shows "Maximum period is 5 years. Please split into multiple requests." An end date before or the same as the start date is also an error.
- Editing the birth data alone saves nothing. To keep your changes, press Overwrite or Save As New in the form.
- Generation consumes credits (the amount depends on the length of the period — see the Plan and Credits chapter).
- A report generated from unsaved edits carries an Unsaved birth data badge in the header when printed.
Analysis themes and additional instructions
Steps
- Under Analysis Themes, tick the ones you want from Love & Marriage / Career & Work / Finance & Money / Health (more than one can be selected; all optional).
- The Additional Instructions field takes any request you want to pass to the AI (optional).
- Once set, press Generate Report.
Notes
- If you choose no theme at all, "Leave unchecked for a general comprehensive analysis" is shown and the report is generated as a general analysis.
- The Additional Instructions field takes requests such as "focus on timing for career change".
- The AI model is selected automatically (there is no selector on the screen).
Viewing and printing the report (saving as PDF)
Steps
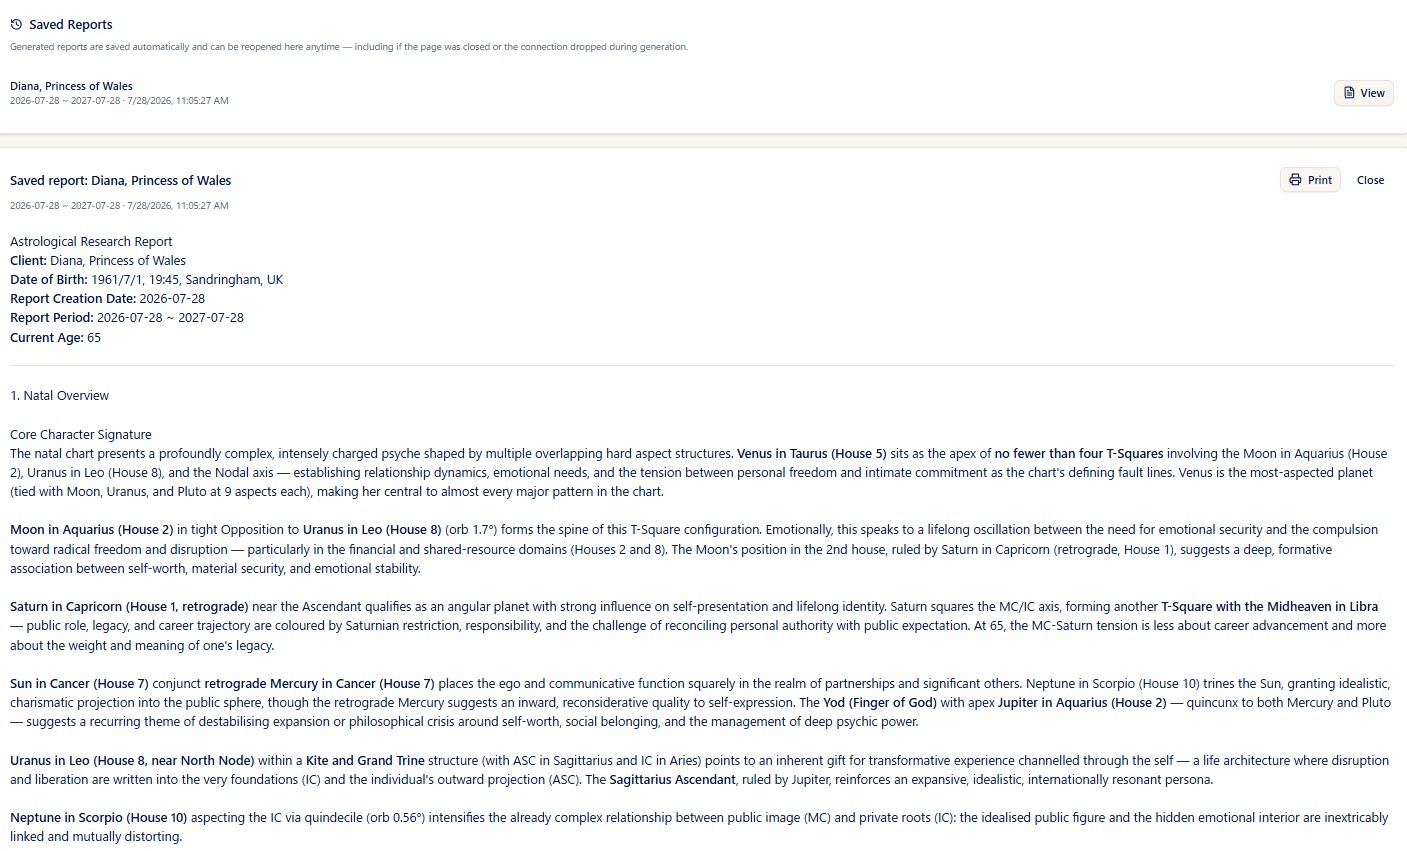
- When generation finishes, the report is shown as Report Result. The credits used and your balance are shown with it.
- While a report is on screen, a Print button is available. Pressing it opens the browser's print dialog.
- Choosing "Save as PDF" as the destination in the print dialog saves it as a PDF file.
Notes
- Printouts and PDFs carry a header with the subject's name, date and time of birth, place of birth, and the forecast period.
- The saved file is named after "AI Report - (subject's name)".
Saved reports (history)

Steps
- Reports you generate are saved automatically and listed under Saved Reports on the screen.
- Each entry shows the subject's name, the forecast period, and when it was created. Pressing View displays that report again.
- You can Print from a redisplayed report as well, and Close returns you to the list.
Notes
- Reports are stored on the server, so even if you close the screen or lose your connection during generation, you can retrieve them from this list.
- When nothing has been saved yet, "No saved reports yet." is shown.
Purchasing credits

Steps
- A guide to credit consumption is shown at the top of the screen, with a Purchase Credits button beside it.
- Pressing it opens the credit purchase screen of your ARI account page in a new tab.
- If you try to generate with insufficient credits, "Insufficient credits. Please purchase credits." is shown, and you can go to Purchase Credits from there too.
Notes
- Your credit balance is always shown in the header at the top of the StarNavigator screen. Purchasing happens on your ARI account page; the button in StarNavigator is the entrance to that screen.
LISA Chat (an AI reading)
Steps
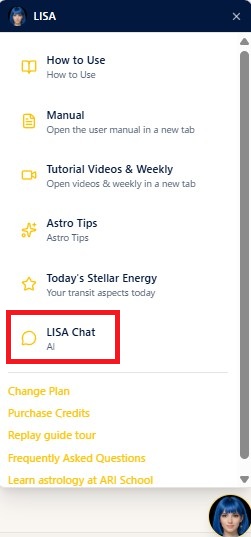
- Press the LISA (round avatar) button at the bottom right of the screen and choose LISA Chat from the menu.
- Select birth data beforehand, on a chart page for example (while nothing is selected, "Please select birth data on the chart page before starting a chat." is shown).
- Read the explanation of credit consumption, then press Agree & Continue and Start Chat to begin the session.
- Type a question into the field at the bottom and send it, and LISA answers interactively.
- To finish, press End Session and choose Save summary & end or Delete summary & end.
Notes
- Answers are based on the birth data currently selected. You can also have it refer to other people you have registered and ask about compatibility.
- Choosing Save summary & end carries a summary of that conversation into your next chat. Past conversations can be reread and printed at any time from View past chat history (the LISA Chat History page).
- Ticking This is my own data makes the answers address you in the second person.
- Starting a chat requires a balance of 2 credits or more (nothing is consumed at the start). Credits are then billed in 0.1 increments according to the volume of the conversation.
Plans and credits
- AI Research Report: Plus plan and above. Each generation consumes credits (up to 1 year = 1.5 credits / 1-3 years = 3 credits / 3-5 years = 4 credits).
- LISA Chat: Basic plan and above. Starting requires a balance of 2 credits or more (nothing is consumed at the start), and credits are billed in 0.1 increments according to the volume of the conversation. Questions involving timing fetch up to five years of data, so a single exchange can consume 1-2 credits; starting with a balance of around 5 credits is recommended so the conversation is not interrupted.
- Credits are purchased on your ARI account page, reached from the Purchase Credits button on each screen.