Harmonic
About this chapter
This chapter covers the harmonic chart. Harmonic charts transform the natal chart by a harmonic number you specify. You can pick a preset (1 to 12), enter a custom value, or use the age harmonic, which calculates from the subject's age.
The screen is split in two, with the harmonic wheel on the left and the right panel (Planets, Houses, Aspects, Midpoints) on the right, so you can check midpoints (half sums) on the same screen. Harmonic charts are available on the Pro plan and above.
Creating a harmonic chart
Steps
- Open Harmonic from the menu and choose the birth data in the header.
- To correct data on the spot, edit the values directly in the birth data form (press Show Chart to apply your edits).
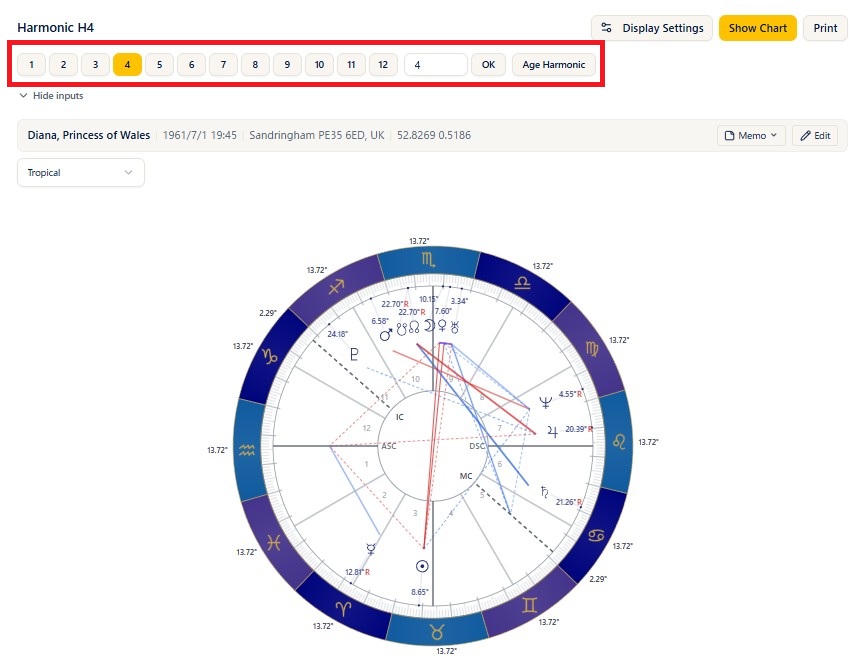
- Choose the harmonic number you want from the preset (1-12) buttons at the top. Pressing a button calculates and displays it on the spot.
- For a number not among the presets, type a value into the field on the right and press OK (the Enter key works as well). Decimals such as 4.5 are accepted.
- When birth data is selected, the Show Chart button recalculates at the current harmonic number.
Notes
- The title above the chart shows the current harmonic number in the form Harmonic H(n).
- If you open the page without selecting birth data, the preset, custom entry, and age harmonic controls are not shown. They appear once you select birth data.
- Custom entry accepts values of 0.01 and above. Non-numeric values and values of 0 or below are ignored.
- Changing the zodiac recalculates automatically at the same harmonic number.
Age harmonic
Steps
- Choose the birth data in the header (the button only appears when birth data is selected).
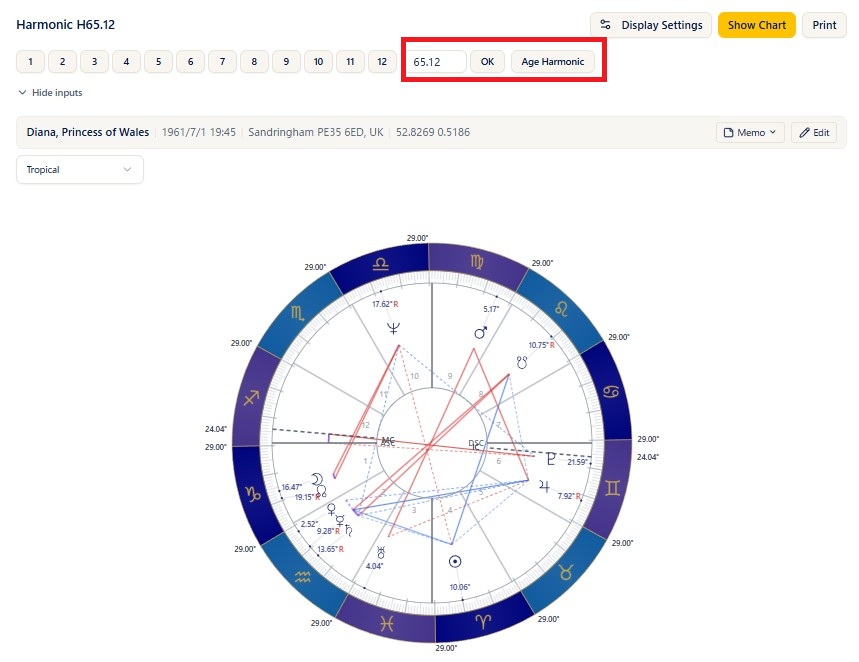
- Press the Age Harmonic button.
- The current age in completed years, derived from the date of birth and given to two decimal places, is used directly as the harmonic number.
Notes
- The calculated age is also placed in the custom entry field, so you can fine-tune it from there and recalculate.
Choosing the zodiac
Steps
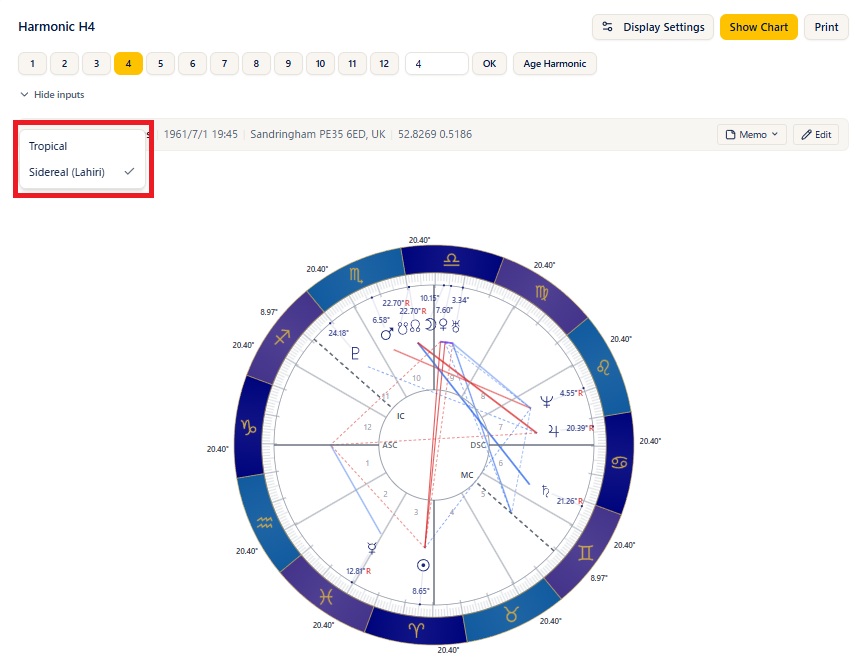
- Choose Tropical or Sidereal (Lahiri) from the Zodiac selector.
- Changing it recalculates automatically at the same harmonic number.
Notes
- The houses of a harmonic chart are always calculated as equal houses (30 degrees at a time from the ASC after the harmonic transformation), so unlike the other charts there is no house system selector.
- The MC is shown at its position after the harmonic transformation and is not tied to the house cusps (a floating MC).
Reading the right panel
Notes
- There are four tabs: Planets / Houses / Aspects / Midpoints.
- Planets tab: lists the planets after the harmonic transformation (planet, sign, degree, declination, house, houses ruled).
- Houses tab: lists the houses (the sign and degree of each cusp, the planets in the house, and its rulers).
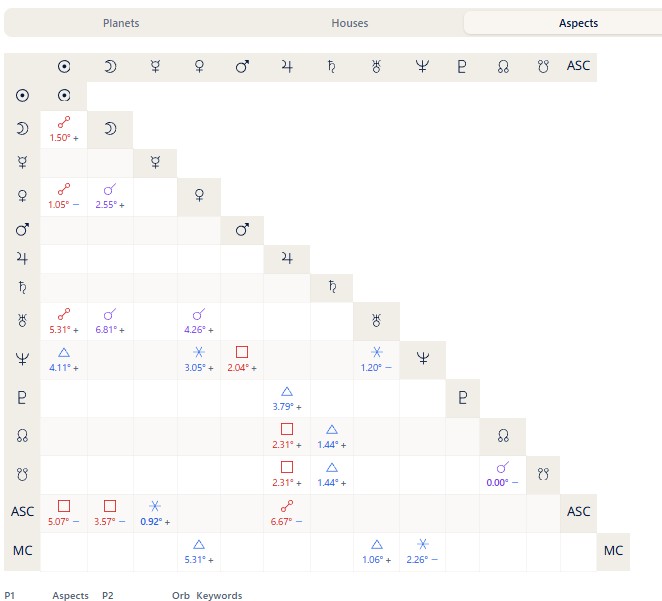
- Aspects tab: shows the list and grid of aspects within the harmonic chart. Aspect patterns are shown as well when there are any.
- Midpoints tab: shows the midpoints (half sums).
- Until a chart has been calculated, each tab shows "No data".
Midpoints (half sums)
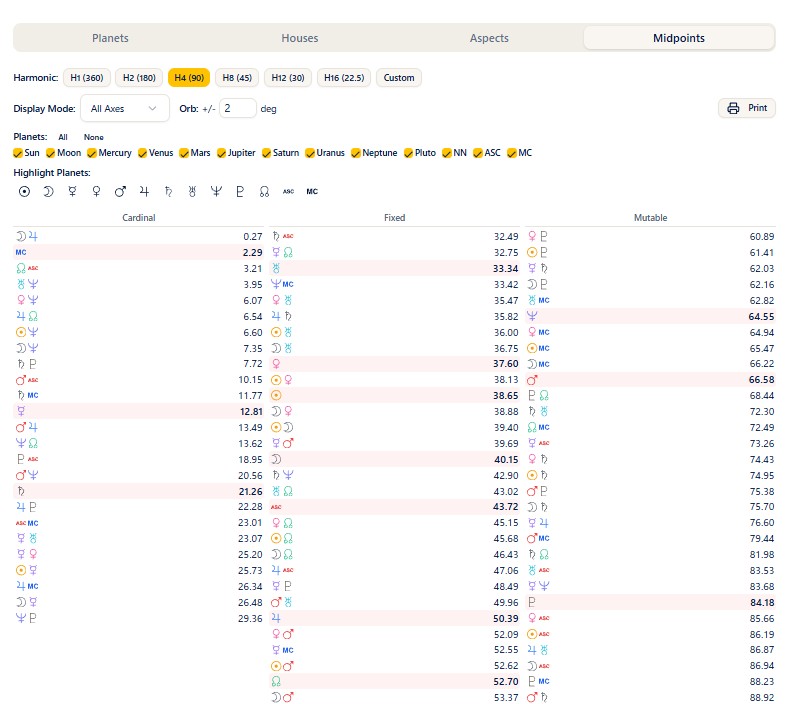
Steps
- Open the Midpoints tab in the right panel.
- Switch the Harmonic, the Display Mode (All Axes / Stimulation / Tree / Graph), the orb, and the planets to choose what you want to see.
- The print button inside the tab prints the midpoints in landscape.
Notes
- The harmonic used for the midpoints is set independently of the harmonic number of the wheel itself.
- The harmonic, display mode, orb, planet filtering, planet highlight, and other controls work exactly as described under "Midpoints tab" in the Natal chapter.
- For the basics of midpoints, see also Half sums on the ARI official site (in Japanese).
Display and printing
Steps
- The Print button prints the harmonic wheel and the data in portrait. The file name includes "Harmonic" and the harmonic number (H(n)).
- Clicking the wheel enlarges it, and from the enlarged view you can save the image with PNG.
- The Display Settings button lets you adjust the planets and aspects shown on the spot.
Notes
- The print button only appears once a chart has been calculated.
- If you print a chart drawn from unsaved edits, an Unsaved birth data note appears in the print header.
Plans
Harmonic charts require Pro and above (a lock icon on the menu means your plan cannot open it). Once you can open the page, all of the features inside it — midpoints, display settings, and the rest — are available.