Traditional (Profections and Lots)
About this chapter
This chapter covers the features for traditional astrology: the Profections page in the menu (a year-by-year table by age) and the items you can display on the natal (single wheel) chart — lots (Arabic parts), custom lots, antiscia, term and face rings, and the profection ring. These features are available on the Max plan.
Everything you can add to the chart is OFF by default. Switch on only the items you want to use.
The Essential Dignity table (with its Score) and the Almuten are not part of this chapter — they appear on the Analysis tab of the natal chart (Pro and above). See the Analysis Tab chapter.
Switching the Traditional display on and off
Steps
- Open Settings from the menu.
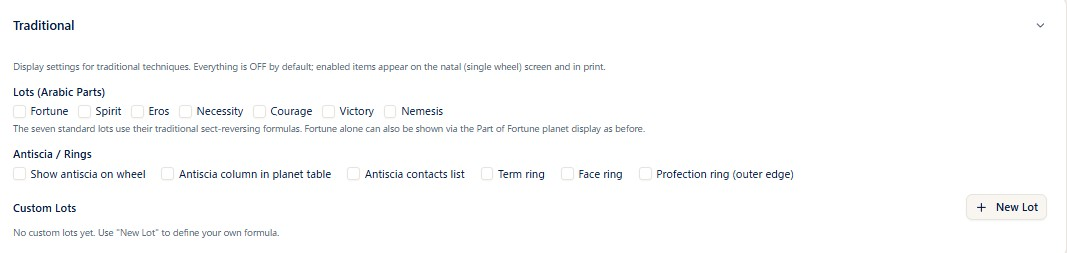
- Click/tap the Traditional card near the bottom of the screen to expand it.
- Under Lots (Arabic Parts), tick the lots you want on the chart.
- Under Antiscia / Rings, tick the items you want to display.
- Press Overwrite Preset to save them into the preset you are using.
- On the natal chart screen you can also toggle the same items from Display Settings at the top right.
Notes
- While nothing is switched on, the card stays collapsed. When some items are on, the number of them is shown next to the card heading.
- The settings are saved per preset. See "Creating a preset" in the Settings chapter.
- The items you switch on appear on the natal (single wheel) screen and in its printout. They are not shown on the synastry, progression, or other screens.
- While a Dragon Head or Dragon Tail (draconic) chart is displayed, and while you are stepping the date and time, the lots, antiscia, and profection ring are not shown.
Profections
Steps
- Open Profections from the menu and choose the birth data in the header.
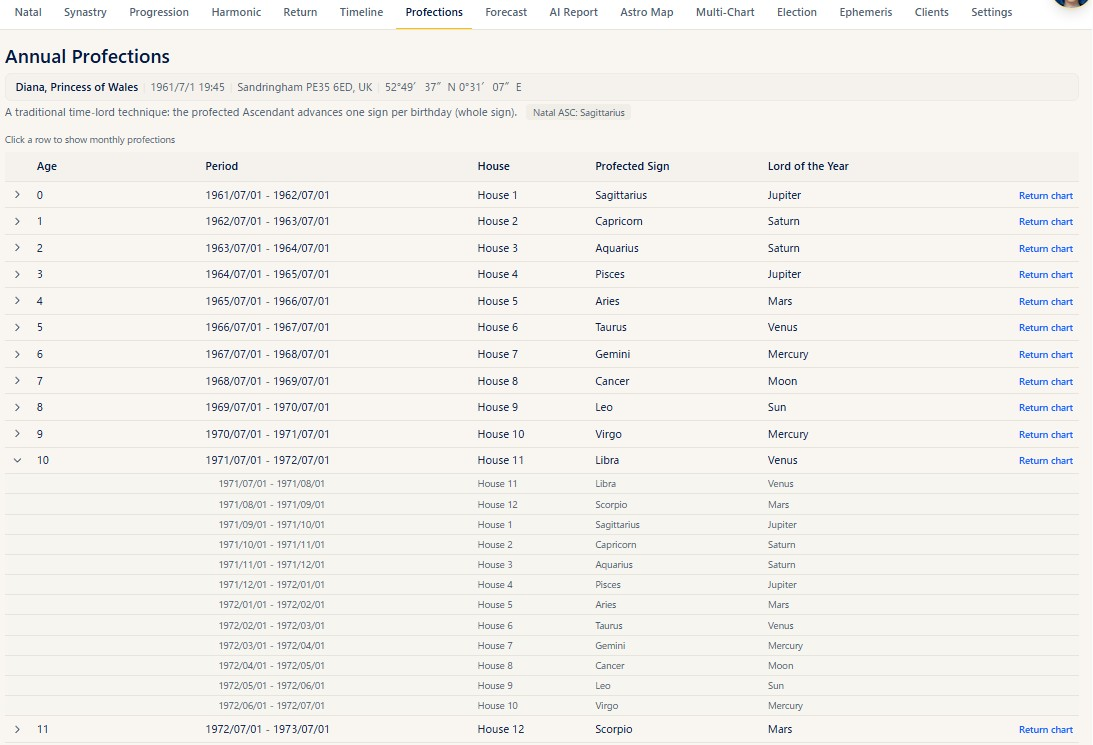
- A table from age 0 to age 100 appears. The row for the current age carries a This year badge, and the page scrolls to that row when you open it.
- Each row shows the age, period, house, profected sign, and Lord of the Year.
- Click/tap a row to open the monthly profections — the year divided into twelve periods — underneath it. Click/tap again to close them.
- The Return chart link at the right of each row opens the return chart screen with that year as the search year.
Notes
- A period runs from the birthday to the day before the following birthday. Each monthly period starts on the same day of the month as the birthday (or on the last day of the month when that date does not exist).
- The sign of the Natal ASC is shown at the top of the screen.
- Profections cannot be calculated for birth data with an unknown birth time; a notice is shown instead of the table.
- Pressing Return chart does not calculate anything by itself. Check the settings on the return chart screen and press Show Chart. See the Return chapter for how to use that screen.
Lots (Arabic Parts)
Steps
- Under Lots (Arabic Parts) in the Traditional section, tick the lots you want to display. Seven standard lots are available: Fortune, Spirit, Eros, Necessity, Courage, Victory, and Nemesis.
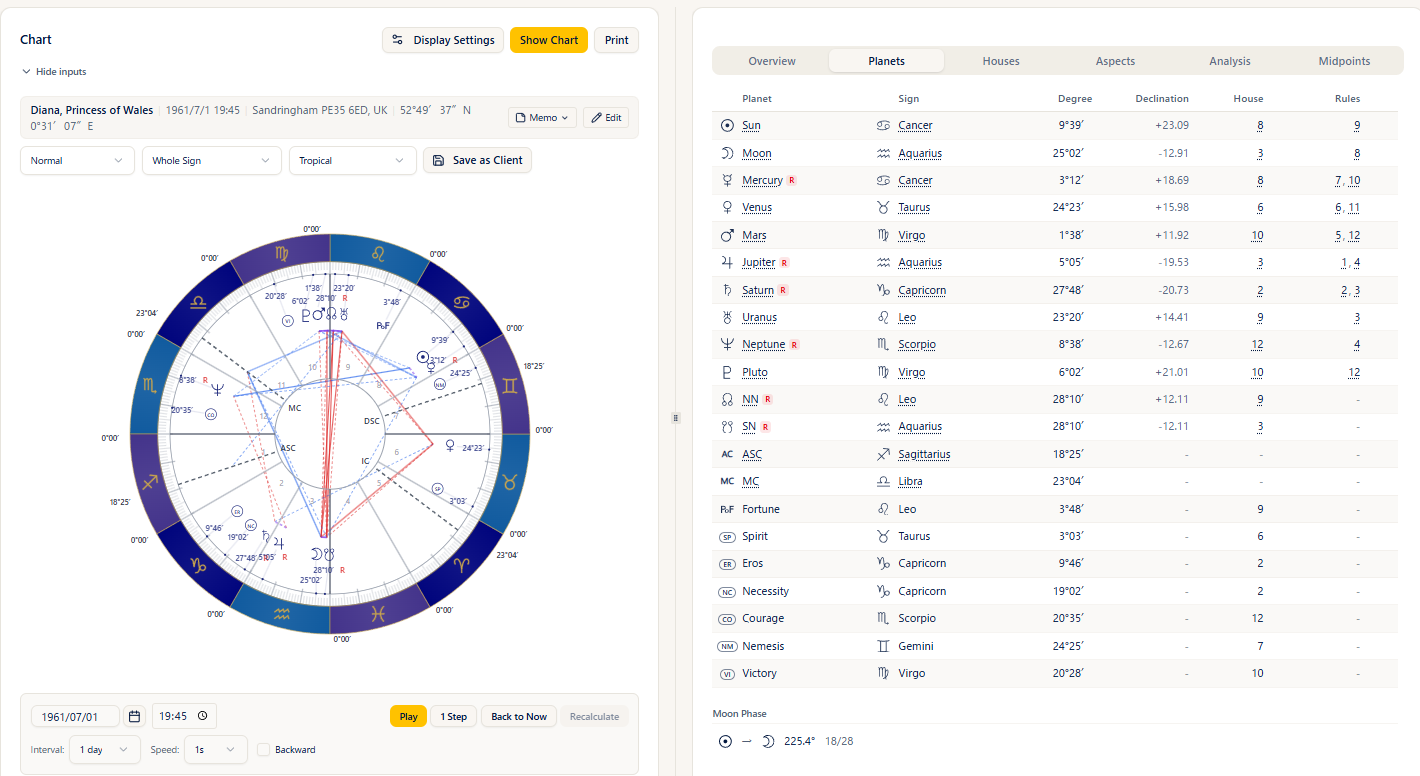
- Display the natal chart, and the lots you chose are placed on the wheel just like the planets.
- The Planets tab in the right panel also lists the sign, degree, and house of each lot you chose.
Notes
- Fortune uses the Part of Fortune glyph; the other lots are shown as small circles with a two-letter abbreviation (Spirit = SP, Eros = ER, Necessity = NC, Courage = CO, Victory = VI, Nemesis = NM).
- The seven standard lots use their traditional definitions, in which the formula is reversed between day and night charts.
- If you only want the Part of Fortune, you can still display it as the Part of Fortune planet as before. In that case it follows the Part of Fortune formula chosen in the settings.
- Lots are not displayed for birth data with an unknown birth time.
Custom Lots
Steps
- Press New Lot under Custom Lots at the bottom of the Traditional section.
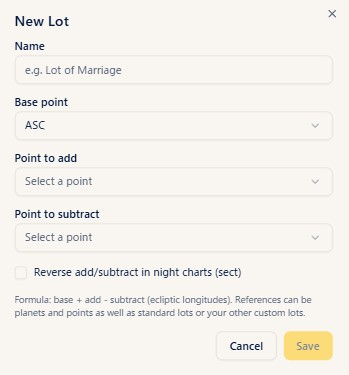
- Enter a Name.
- Choose the Base point, the Point to add, and the Point to subtract. Besides planets and points, you can also choose the standard lots and your own other custom lots.
- To swap the added and subtracted points in night charts, tick Reverse add/subtract in night charts (sect).
- Press Save and the lot is added to the list, with your choices shown next to the name as its Formula.
- Your custom lots appear alongside the standard ones under "Lots (Arabic Parts)". Tick one to show it on the chart and in the Planets tab.
Notes
- Use the pencil icon in the list to edit a lot and the bin icon to delete it. Deleting a lot also removes it from your display selection.
- Two custom lots cannot have the same name.
- You can create up to 50 custom lots.
- The lot you are editing does not appear among its own reference choices.
- On the wheel a custom lot is shown as a circle containing the first two characters of its name.
Antiscia
Steps
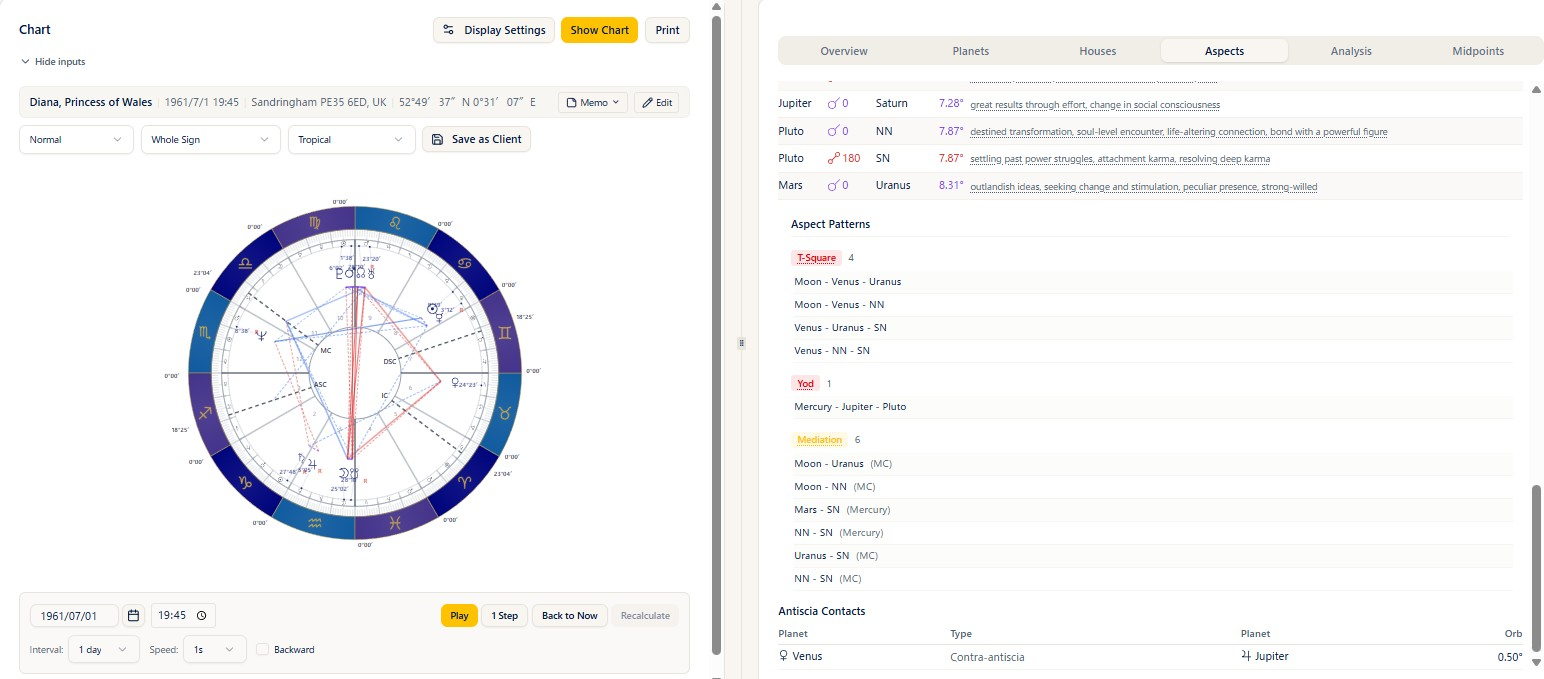
- Under Antiscia / Rings in the Traditional section, tick the items you need.
- Show antiscia on wheel: the antiscion of each planet is overlaid on the wheel in a faint symbol.
- Antiscia column in planet table: a column of antiscion positions is added to the Planets tab in the right panel.
- Antiscia contacts list: the list of contacts is shown below the Aspects tab in the right panel.
- Display the natal chart and the items you chose appear.
Notes
- In the contacts list, the Type column shows whether a contact is an antiscia or a contra-antiscia.
- When there is nothing to show, No contacts within 1° orb is displayed.
- Antiscia are for display only. They do not affect the aspect grid or the AI report.
Term and face rings
Steps
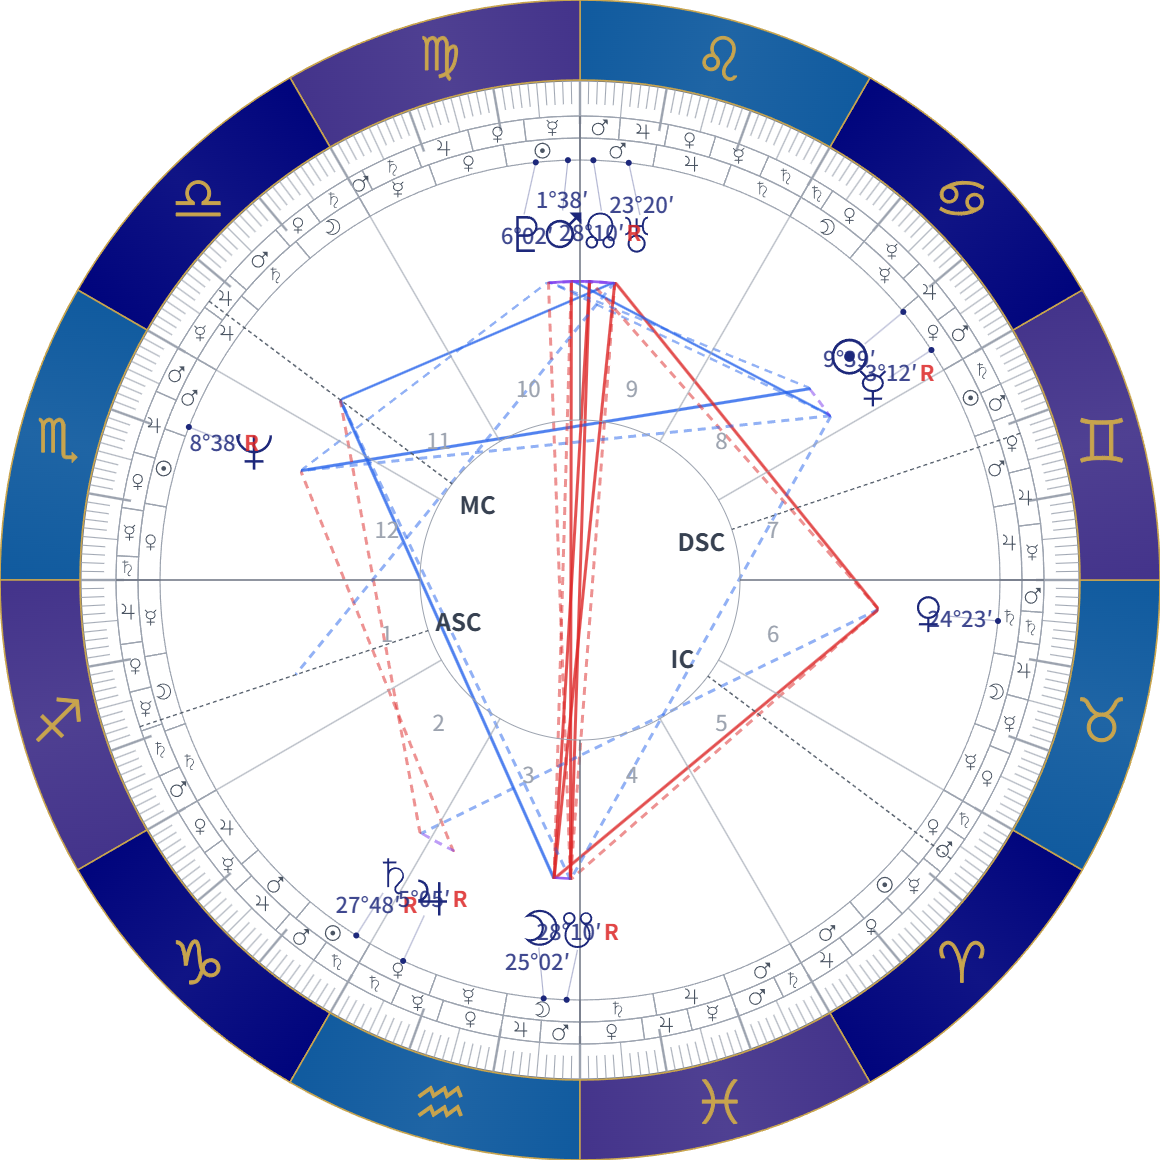
- Tick Term ring and Face ring in the Traditional section.
- Display the natal chart and the rings appear inside the sign band. The terms divide each sign into five parts and the faces into three parts of ten degrees, each marked with the glyph of its ruler.
Notes
- The term divisions follow the Terms System chosen in the settings.
- With a ring displayed, the planet glyphs and degrees move inwards by the width of the rings.
- The term ring and the face ring can be used on their own or together.
Profection ring
Steps
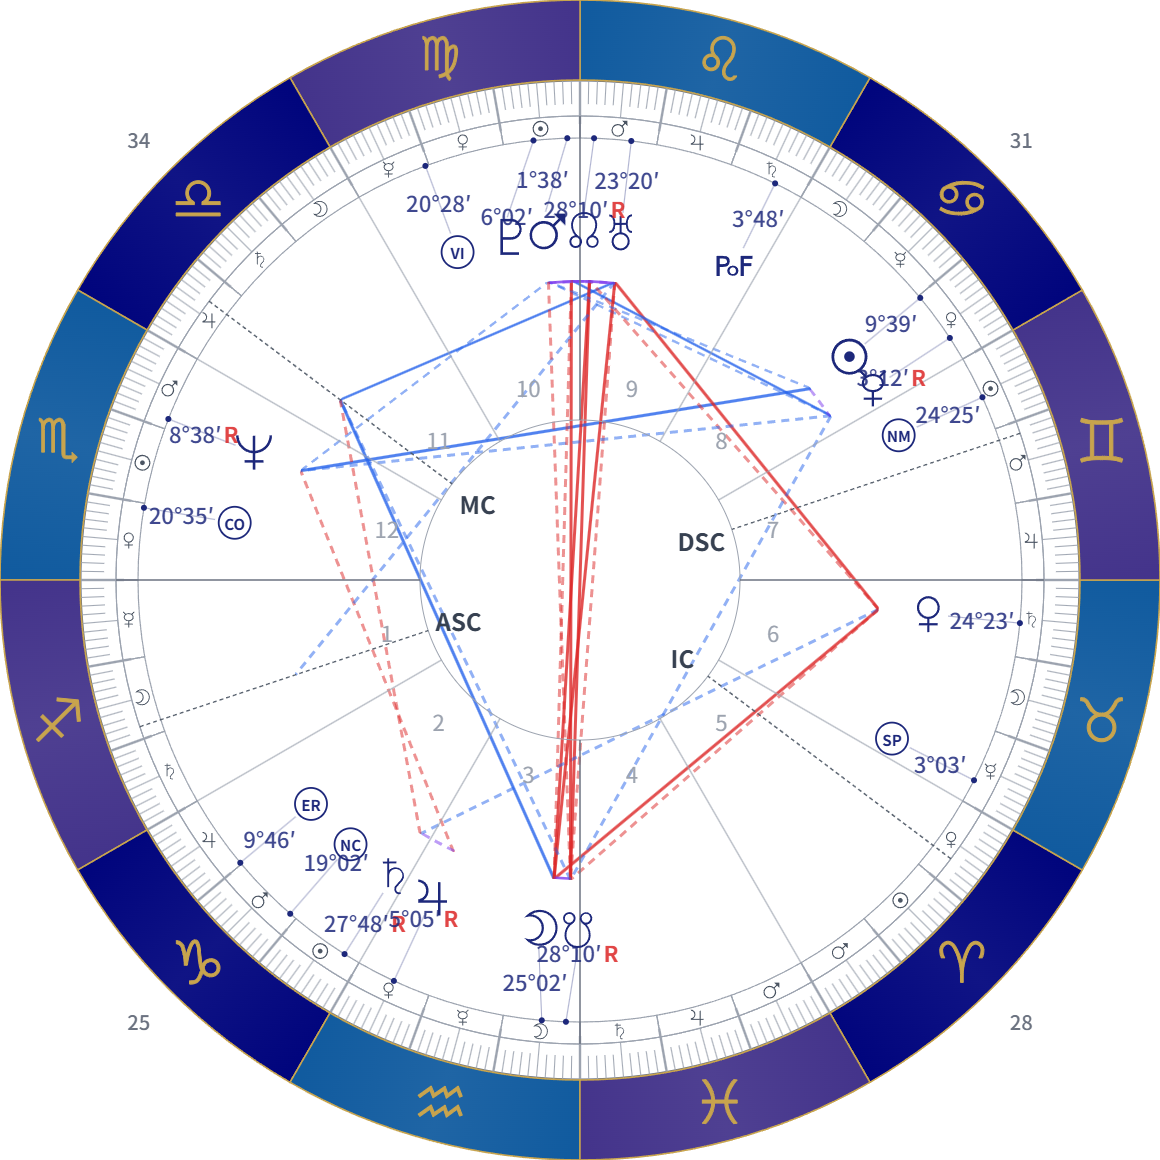
- Tick Profection ring (outer edge) in the Traditional section.
- Display the natal chart and the ages are shown around the outer edge of the wheel, one age per sign.
- Use the Profection ages ○-○ selector at the top of the chart screen to choose which twelve years are shown.
Notes
- The twelve years containing your current age are selected to begin with. The spans run in twelve-year steps from age 0.
- Only the single selected span is drawn; spans cannot be stacked.
- Switching to another person resets the span to the twelve years containing the current age.
- The ring is not shown for birth data with an unknown birth time.
Display and printing
Steps
- The traditional items you switch on are included in the natal chart printout as they appear on screen.
- For how to print, see "Display and printing" in the Natal chapter.
Notes
- The rings and lots follow the chart when you zoom in and out on screen.
- The profections table has no print button of its own. Use your browser's print function if you want a paper copy.