Timeline
About this chapter
This chapter covers the Timeline feature. The timeline lets you record past events in your life by year and month, and then automatically calculates and lists the main configurations for those periods (direction, transit, and the progressed Moon).
The events you record are also connected to the tri-wheel (the progressed and transit chart) for that period. The timeline is available on the Basic plan and above.
For the basics of transits, see also Transits on the ARI official site (in Japanese).
Opening the timeline (choosing the birth data)
Steps
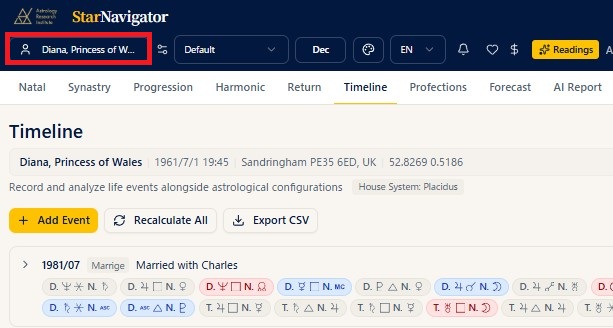
- Open Timeline from the menu.
- Choose the person you want a timeline for in the birth data picker in the header.
- Once chosen, the list of events registered for that person appears.
Notes
- While no birth data is selected, a message says there is no data and events cannot be registered. Choose a subject first.
- Besides the birth data you have registered yourself, you can choose people from the Shared Data.
- The house system used for the calculation is shown at the top of the screen (it follows the house system on the settings screen).
Registering an event
Steps
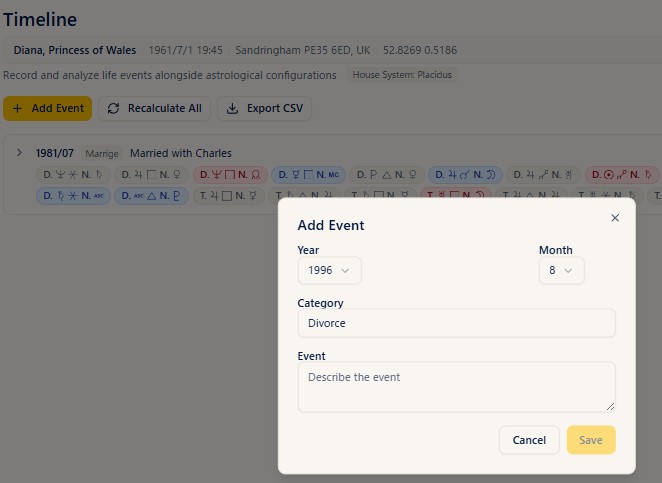
- Press the Add Event button.
- Fill in the following in the dialog that opens.
- Year: the year the event happened (1900 to 2100).
- Month: the month the event happened (1 to 12).
- Category: any classification you like (career, marriage, move, and so on).
- Event: what happened (required).
- Press the Save button and the event is registered, the configurations for that period are calculated automatically, and it is added to the list.
Notes
- The event cannot be saved while Event is empty.
- The Category field suggests category names you have entered before.
- The date is specified only by year and month (not by day).
Reading the event list
Steps
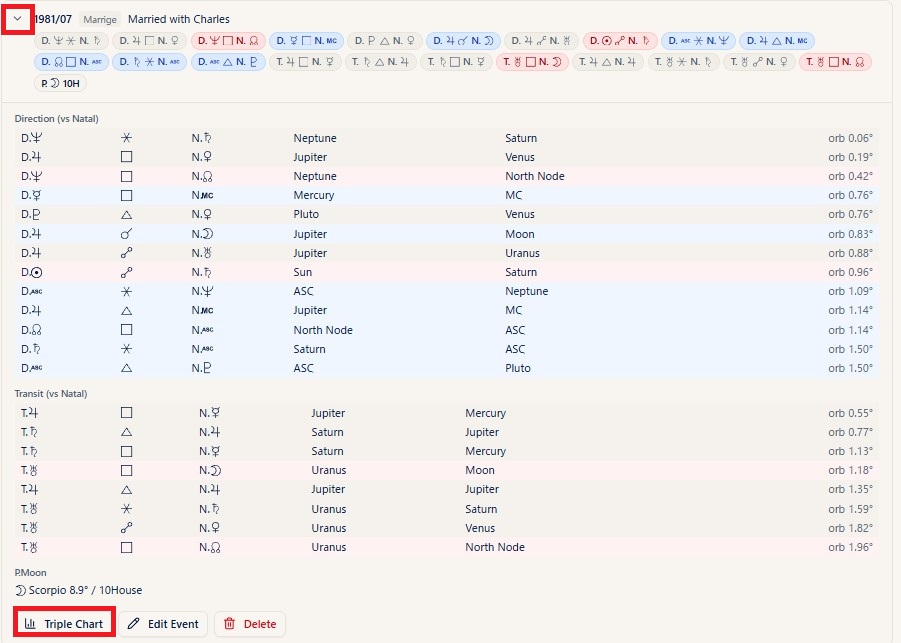
- The list shows the events you registered with their year/month, category, and description.
- Clicking an event row opens its details (clicking again closes them).
Notes
- Even while collapsed, the main aspects of that period are shown as small badges (symbols), along with the house of the progressed Moon (P.Moon (n)H).
- The badges and the aspect tables are color-coded according to their content.
- Opening the details shows the following information in tables.
- Direction (vs Natal): the aspects between directed planets and natal planets (planets, aspect, orb).
- Transit (vs Natal): the aspects between transiting planets and natal planets (planets, aspect, orb).
- P.Moon: the sign, degree, and house of the progressed Moon.
- When no configuration data has been calculated, No astro data is shown.
Viewing the tri-wheel for that period
Steps
- Click the event row in the list to open its details.
- Press the tri-wheel button inside the details.
- The tri-wheel (progressed and transit chart) screen opens, using the first day of the event's year and month as the transit date.
Notes
- The tri-wheel lets you check the direction, transit, and natal charts of that period together (for how to read the tri-wheel in detail, see the Progression chapter).
Editing and deleting an event
Steps
- Click the event row in the list to open its details.
- Pressing the Edit button opens the same dialog as when registering, where you can correct the year, month, category, and event. Updating with Save recalculates the configurations as well.
- Pressing the Delete button brings up a confirmation dialog. Check it and press Delete, and the event is removed.
Notes
- The delete confirmation dialog shows the "year/month - event" of the item concerned. Press Cancel if you want to stop.
Recalculating everything
Steps
- Press the Recalculate All button.
- The configurations of every registered event are recalculated with the current house system.
Notes
- The button cannot be pressed while no events are registered.
- Use it when you want the calculations brought back into line, such as after changing the house system in the settings.
Exporting to CSV
Steps
- Press the Export CSV button.
- The list of registered events is downloaded as a CSV file (
timeline_events.csv).
Notes
- The button cannot be pressed while no events are registered.
- It is handy when you want to look back over the timeline in a spreadsheet.