Multi-Chart
About this chapter
This chapter covers the Multi-Chart. It compares up to five charts on one screen, either stacked (Overlay) or side by side (Parallel). Each slot can have its own birth data and chart type. The multi-chart is available on the Max plan.
Creating a multi-chart
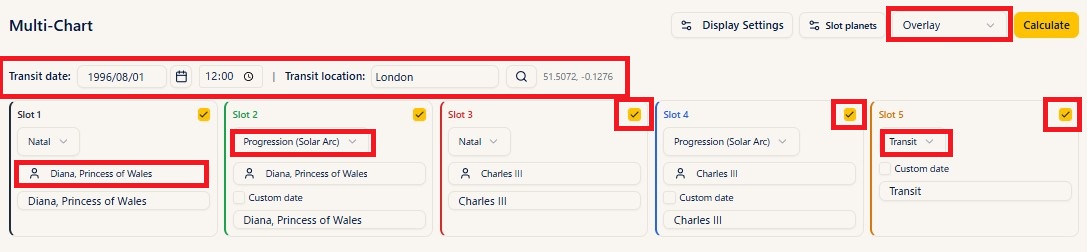
Steps
- Open Multi-Chart from the menu.
- Tick Enabled on the slots (1 to 5) you want to use.
- Choose a Chart Type for each slot (Natal / Progression (Secondary) / Progression (Solar Arc) / Transit / Return).
- Choose the subject with Select birth data (a transit chart needs no birth data). For a return chart, specify the Return planet (Sun / Moon / Jupiter / Saturn) and the Search year.
- Types that need a date, such as transit and return charts, use the Transit date and Transit location at the top. Ticking Custom date on a slot lets that slot use a different date, time, and place.
- Choose Overlay or Parallel.
- Press Calculate and the charts appear.
Notes
- Each slot has its own color. The label field on each slot changes its display name.
- A transit slot with no birth data selected is calculated with the shared date and time at the top. If that slot has a Custom date set, however, the custom date (and its location) take priority over the shared one.
Overlay and Parallel
Pressing Calculate displays the charts in the mode you chose, with the planet positions of each slot (sign and degree) listed below.
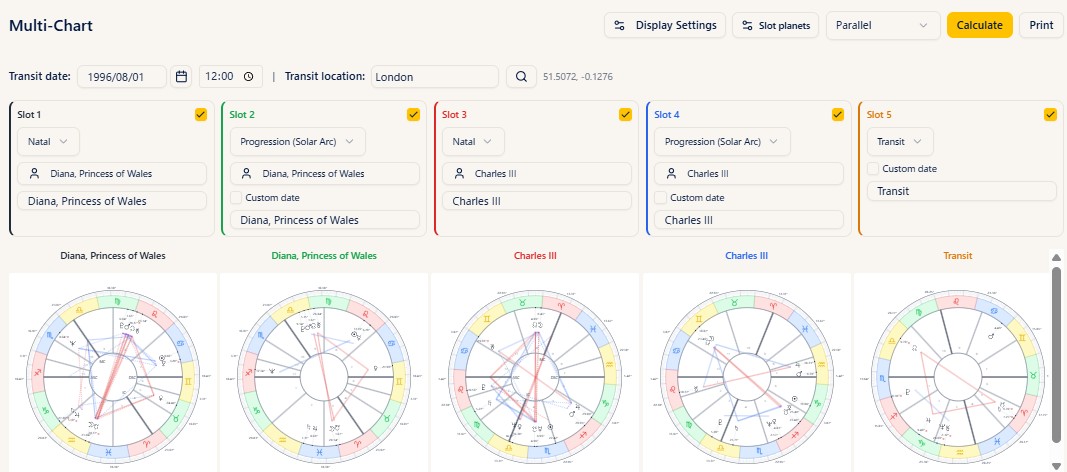
Notes
- Overlay: stacks every chart into a single circle.
- Parallel: lays the charts out side by side.
- The Overlay / Parallel dropdown in the header switches between them at any time, including after calculating.
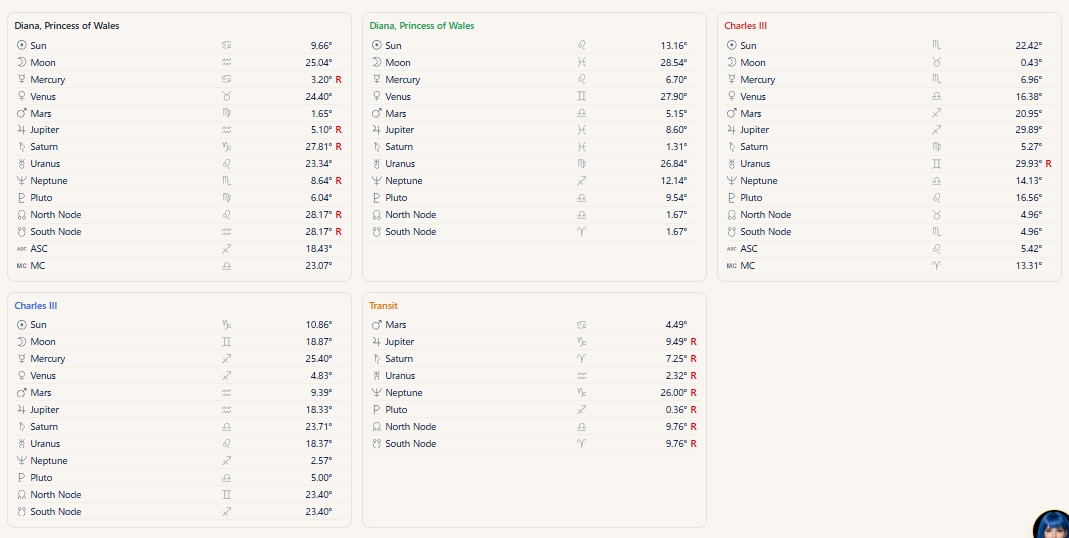
The planet positions of each slot
After calculating, the planet positions (sign and degree) of each slot are listed below the chart. Which planets are shown can be changed with Slot planets (see below).
Aspects between slots (Aspect Pairs)
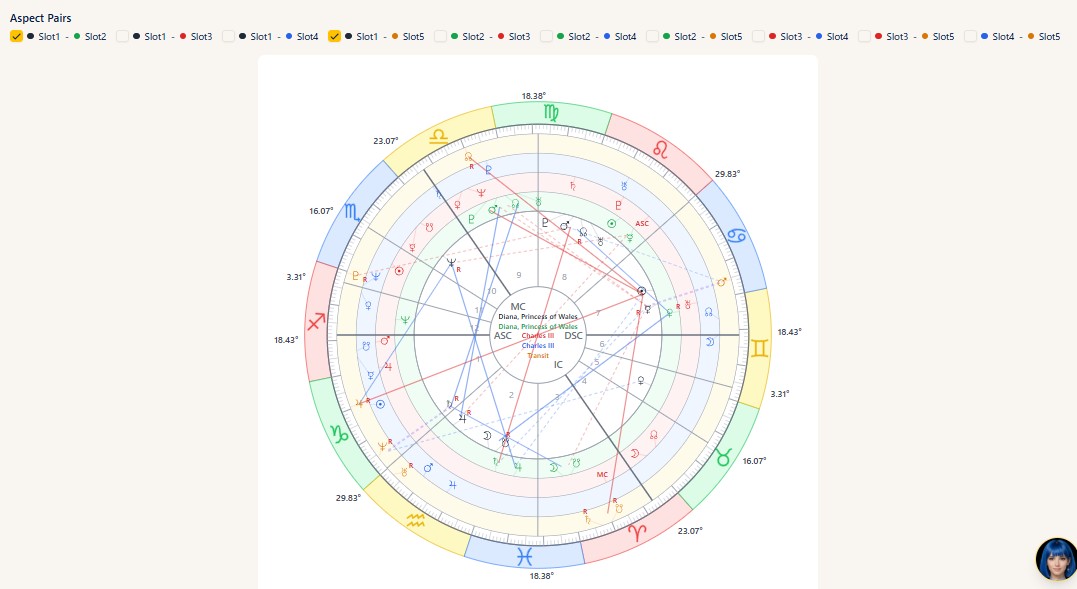
Steps
- Calculating two or more charts in Overlay mode brings up an Aspect Pairs section above the chart.
- Tick the combination you want to see (Slot 1 - Slot 2, for example) and the aspect lines between those two charts appear on the circle.
- Several combinations can be selected at once. Clearing a checkbox removes that combination's lines.
Notes
- The Aspect Pairs section is only shown in Overlay mode (it does not appear in Parallel).
- With the Standard color theme, the colored dot of each combination corresponds to the color of its ring (slot) on the circle. With Purple every ring is the same color, so you cannot tell them apart by color — identify the combination by the position of the ring instead.
- The aspect types and orbs shown follow the aspect settings of the preset in use. Each slot's chart type is classified as N (natal) / P (progressed) / T (transit), and the settings of the corresponding tab (N-N / N-P / N-T / P-P / P-T / T-T) are used. The classification is: natal chart = N, progressed chart (secondary or solar arc) = P, transit and return charts = T (see the Settings chapter).
Display and printing
Steps
- Slot planets lets you choose which planets are shown for each slot. It applies both to the chart on display and to the planet list below it.
- After calculating, the Print button prints the charts and the data.
Notes
- Display Settings adjusts aspects, house symbols, and the rest all together (Plus and above).
Plans
Multi-chart = Max and above. Display Settings = Plus and above.